==========================================
Oct 22, 2012
Built the frame base today. Frame ended up 1/32" out of square when all welding was done. Specifics are:
- 3"x2"x.120 wall tubing
- Overall 5' wide (will be finalized once the suspension and tires are mounted).
- Tub is 38" wide at base.
- 6'1" long.

=========================================
Nov 3, 2012
Continued on the frame today. Fabricated the cross supports and draw bar into the frame. Need to finish welding the receiver tube but the A-frame is all burned in. Measures just 1/32" off center-line at the tip of receiver tubing. Pretty happy with that. Specifics:
- 3"x2"x.120 tubing
- 2" id receiver tube
- 3'6" from frame face to receiver face
- Total weight at this stage, 130 lbs
- Spacing between middle beams will accommodate a 10 gallon water tank.

=========================================
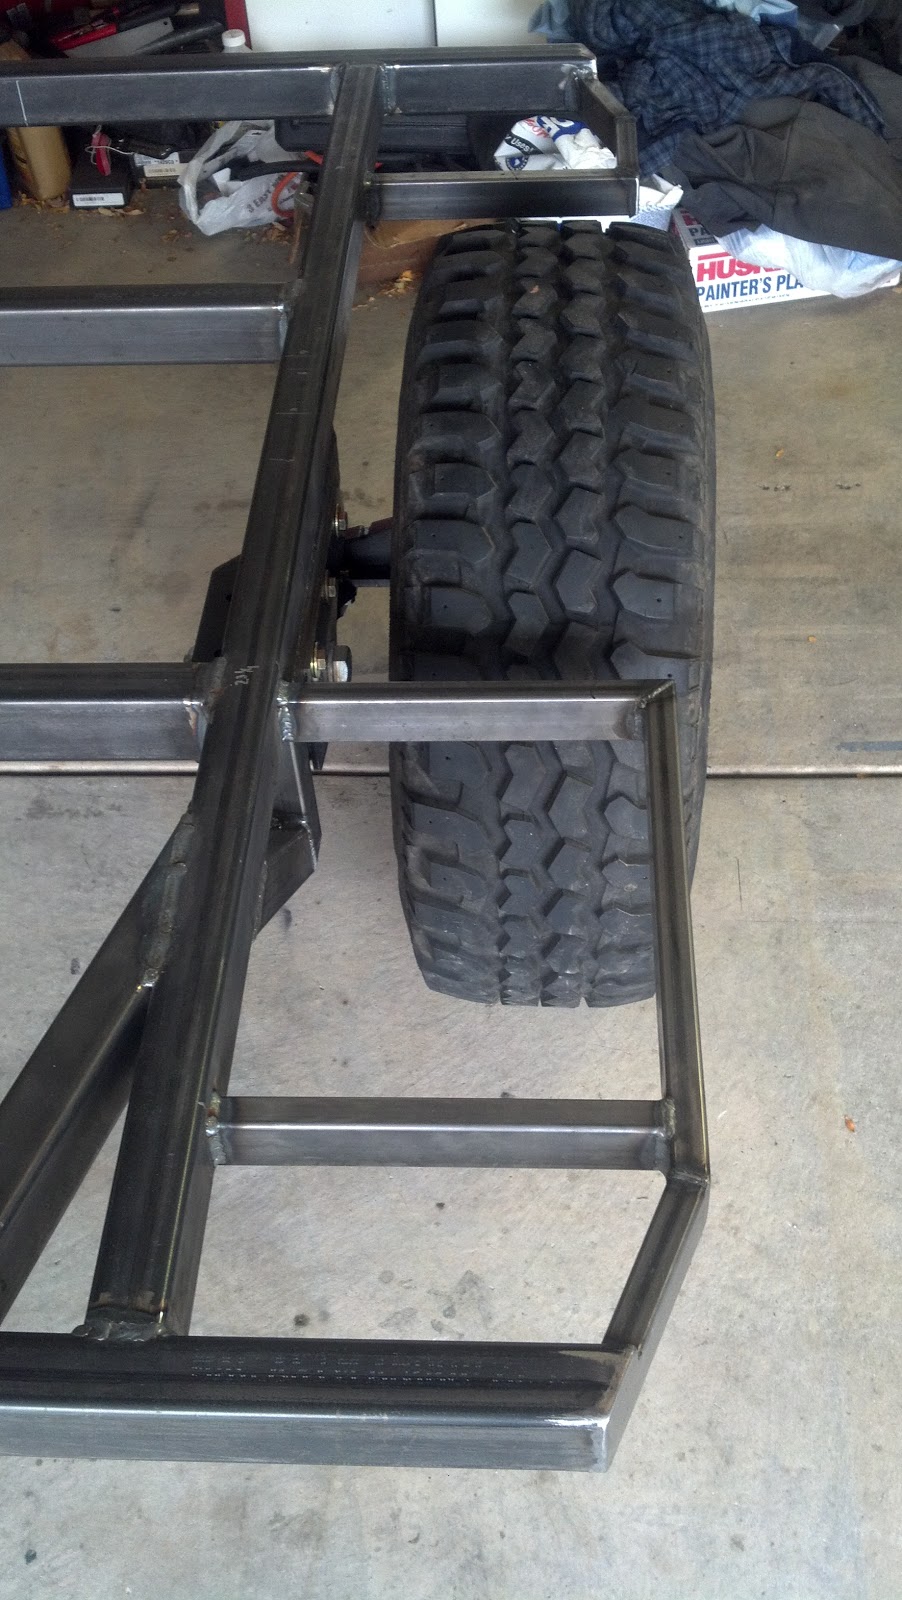
Nov 11, 2012
Fabricated the suspension and sliders today. The suspension an axle-less design from Timbren. I've very happy with the finished product.
First step was to cut the risers which the suspension will mount. This was done to add a little extra height for level towing and to add enough space between the support tubing and floor to clear the water tank.

Next, I drilled 1/2" holes through the rail and drilled out on side to 3/4". I cut 3/4" DOM tubing into anti-crush sleeves so they were recessed 1/16", welded them in the rail and ground them flat. This will permit the 1/2" grade 8 bolts to be torqued to spec without crushing the rail and thus loosening up.

Skipped a few pictures but here the risers are tacked in place, the suspension bolted on and the cross support tube welded in. Also, I've tacked in the sliders to protect against hanging on the blunt end of the suspension unit.


Finished the day by lifting off the suspension in preparation of finish welding.
==========================================
Nov 12, 2012
Finished welding the underside of the frame. Flipped it over and welded some of the topside. Will finish welding this week.Plan for the weekend, installing the brakes, hubs and tires for a rolling chassis. Maybe I'll start on the running boards and fenders.
==========================================
Nov 15, 2012
Finished up the welding on the top side. Mounted the brakes and hubs. I'll mount tires this weekend and start the running boards. they need to be attached to the frame prior to mounting the sides.


==========================================
Nov 18, 2012
Build the running boards on one side. Using 1"x2"x.120 tubing I built them out to about 1-2" short of fulling covering the 35x12.5's. I'll cover them with probably diamond plate aluminum. There will also be a couple tie down hoops.
The front board has about 2 square feet of space. Good amount of storage.

Hoping the rear will store a 2.5 gallon propane tank.

The inner clearance turned out more than expected which is a good thing I guess.

==========================================
Nov 28, 2012
Finished the other side running board over Thanksgiving weekend. I plan to mount a propane tank on each rear board but needed to figure out the size to use. I bought an 11# (2.6 gal) tank from Cabela's yesterday and mocked up one side to check fit. It looks like it will fit fine and remain inside the fender line and out of the way of flying debris.


To do list for the immediate future:
- Cut frame to mount rear receiver tubing.
- gusset inter rear corners
- gusset receiver tubing to A-frame.
- Flip frame and finish welding underside.
Once the above is complete I'll start attaching the sides, fabing the fenders and start the tailgate. Plan is to be at the point of constructing the lid the week between Christmas and New Years.
==========================================
Dec 01, 2012
Not a lot done today but every task completed is another step closer to finishing. So, I cut the holes in the rear cross sections and mounted the 2" receiver tube.


Dec 01, 2012
Not a lot done today but every task completed is another step closer to finishing. So, I cut the holes in the rear cross sections and mounted the 2" receiver tube.


Next, I attached the drawbar gusset.

And finally, I attached the front kick plate which the front tube section will be welded to. Since I welded it 1-2" at a time to avoid overheating and warping it, it's not very pretty so once the tube is on I will grind/sand it down flat to a seamless finish. Hey, I want it to look good too.

I must say, my welding is looking better. Having a great time building this project and looking forward to getting it out into the great outdoors.

Jan 13, 2013
Finished building the fender frames these past couple of weeks. I'll skin them later with 14g sheet. I'll use a thicker plate on the flats since there will be items stowed there.


I also reassembled the rear corner jacks. With a lug nut welded on the crank, they work great using the electric screw gun on low.


For maximum stability I have to pull them together at the pin with a ratchet strap but when in place the trailer doesn't move very much.
The trailer is coming along quite nicely. Looking at the brakes, is that a parking brake lever I see? Will that be electric or mechanically controlled?
ReplyDeleteNo parking brake. These are electric brakes.
ReplyDeleteCould you post a few pictures of the jacks you are using? Jim.
ReplyDeletewe went for a 7+ day camp and used the 2.5 bottle. one is generally enough. be sure to shield it from rox, trees, etc etc
ReplyDeleteJim: I'll get some this weekend.
ReplyDeleteAnonymous (Mark??): I hear ya. But I want to avoid: 1) the trip prep task of making sure there's enough and 2) the "generally." Use one until it's empty then switch over and fill it when I have time. I'll probable build a small rail around the area from the fender to the rear tub corner.